Cleaning a deep freezer is smart if you want to get rid of nasty odors and be able to actually see what’s in there! Here’s how to clean a deep freezer properly.
Keeping the inside of your freezer clean is important for taking care of your ice chest. The good news is that modern freezers and older freezers aren’t really that difficult to clean! You’ll see the easy steps below and wonder what took you so long to get rid of those stubborn spills! Here is the best way to get started doing regular cleanings of your smelly freezer! Learn how to clean a deep freezer the easy way!
I don’t know about y’all, but I live in Texas. Hunting, fishing, ranching…we all have deep freezers, and they are fairly well stocked, most of the time.
Hate cleaning but love a clean house? Pick up this printable Spring Cleaning Bundle and you'll be able to clean it all without feeling overwhelmed!
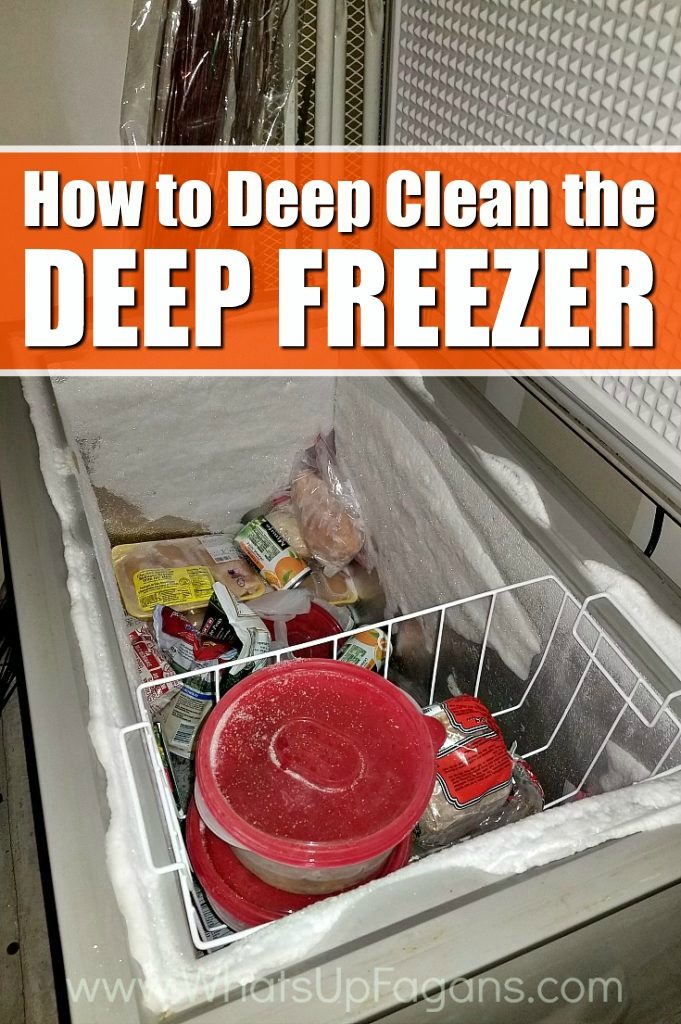
My chest freezer, unfortunately, is pretty old and is not of the frost-free variety. I don’t usually let it bother me, but lately, it developed a really odd smell. The odor was somewhere between dirty feet and rotten chicken. You know…that putrid odor that ice gets when it’s been in the freezer, for way too long.
As it turns out that was exactly the case – the ice had built up in my freezer and around the door, so every time we opened it up, it was exposed to whatever else was in the air, and since my freezer is in the garage, that wasn’t anything good!
So, today’s simple advice is going to be all about cleaning a deep freezer! Just be sure to check out my follow-up post about how to organize a chest freezer so you’ll know what to do once it’s clean and stink-free! It’s all little steps toward a more organized life and extra money in your pocket!
Cleaning Deep Freezer
Add these supplies to your cleaning checklist to get started!
Supplies Needed for Cleaning Deep Freezer
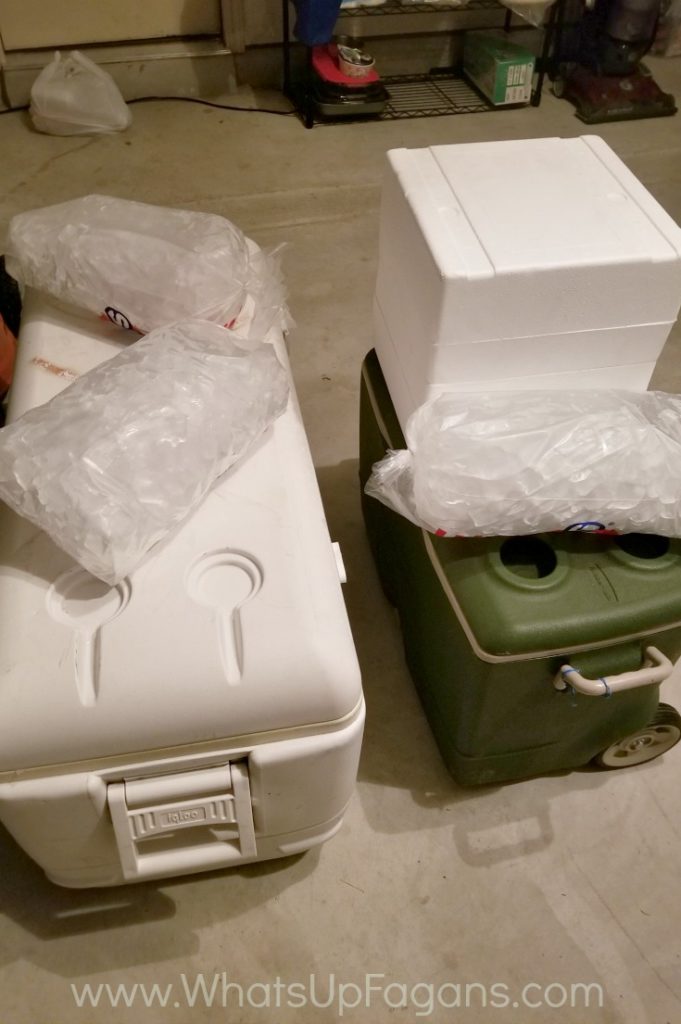
- Ice chests large enough to hold everything that is currently in your deep freezer, plus room for ice.
- ICE…however much you need to keep your frozen food frozen while it’s displaced into the ice chests. I bought 6 bags and only needed 3. The trick is to get enough, but not overspend like I did.
- Bucket of warm, soapy water
- Spray bottle
- Vinegar
- Washcloths and towels
- Gloves for cleaning
- Bleach (if you find mold or mildew)
- Toothbrush or screwdriver for scrubbing crevices
Removing the Food from Chest Freezer
If you have to defrost it, cleaning out the freezer can really take time. The way I do it is easy because it does most of the work itself overnight, but it is still a lengthy process and you need all the food that came out of the freezer to stay good in the meantime.
When I decided to attack this giant job, I realized that I didn’t have any coolers or ice chests that would accommodate all the food I had in the freezer.
Easy solution?: I posted a plea for help on my church’s Facebook group and got a bunch of people offering me the use of their ice chests, which worked out great! Don’t spend money when you don’t have to – reach out and ask for help when it’s something so simple (and temporary).
I don’t have a true “before” photo for you of my freezer, and I’ll be honest – I am truly too embarrassed to show anyone the condition my freezer was in. Yes, it was that bad. Picture a load of laundry piled into a basket, pant legs, and long sleeve shirts all intertwined to the point where you can’t tell which is what. Now, picture that with food. And ice.
But here is a picture of it about half emptied, when things began to make a little bit of sense!

Right off the bat, I started by separating items into separate coolers so that inventorying and putting them away would be easier when it finally came time for organizing a chest freezer later.

Be sure to have plenty of ice – especially if you use my “overnight” method. The 3 extra bags I bought that wouldn’t fit into the chests still came in handy though – I just stacked them on top of the ice chests after they were full for extra cooling power.
They did double duty for me too – they melted a bit overnight, so I got to clean my garage floor as well! And, yes…it took 3 different coolers to hold all my stuff!
How to Defrost a Chest Freezer
Defrosting a chest freezer used to mean chipping out the ice, using all kinds of elbow grease and wearing yourself out.
Once I removed all the food, I did the easiest possible thing – I unplugged the freezer, stuck a broom in it so the door could not shut on itself, and went to bed.

When I got up this morning, all I had left was cold water in the bottom of the freezer, bad water spots, and that nasty smell.
How to Clean a Deep Freezer
I had pulled some of the worst of the ice out the night before, so I didn’t have a ton of water in the bottom but be aware that most freezers have a drain plug built right in to make it easier to get rid of the water.
I didn’t use mine this time – I kept it sealed and went to work with my warm, soapy water and washcloth. I use the washcloths that have the scrubbing mesh on the back, so you get a good scrubbing surface.
1. Start by wiping down all your surfaces inside the freezer, and pay special attention to the corners. You’ll find that a lot of tough stains and foul odors are hiding there in the cracks! It’s not a good time to find that but I can assure you it’s an easy task to get rid of those rotten smells. Since a lot of spillages is going to seek into those cracks and corners naturally, just make sure to pay attention to those interior walls and those corners as a first step.
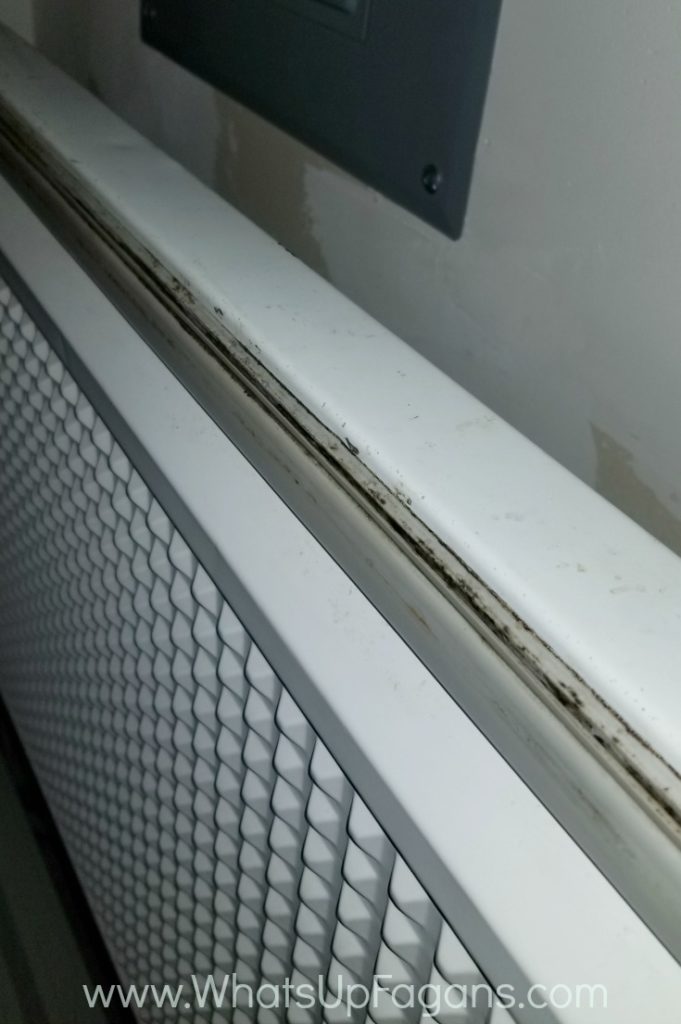
2. Wipe down the rubber seal around the top of the freezer basin. Some of these are flat and just have a surface to clean. Others have a raised edge where water and food can get between them and get stale over time – you may even find mildew. Clean these areas carefully with hot, soapy water.
I’m always amazed at the amount of food spoilage that is in the cracks and how much I get out through cleaning! The freezer door seal is like the perfect hiding ground! (Don’t forget to clean in the cracks of the door handle, too!)
3. If you find any trace of mildew or mold, you’ll need to wash it with a bleach solution as well. Mix ¼-cup of chlorine bleach with 2 cups of water, and apply to all affected areas with your washcloth. Don’t forget the rubber seal around the door of the freezer as well! Use a flathead screwdriver under a cloth to get in the seal if it’s hard for you to get your fingers in there.
4. Wipe down the entire outside of the freezer while you have your warm, soapy water. Mine is old and has rust spots on it, but it also had cup ring marks on it, a few small smears of dirt, and something red…anything is possible when you keep your freezer in the garage!
You might need to try various cleaning methods to get the fridge freezer clean on the outside, but just do your best and keep up with the periodic cleaning. Just be sure to wipe away any leftover drops of water so that it doesn’t cause rust, etc to form.
5. Once I had done the basic cleaning, the smell just still wasn’t quite right, and I could see lots of watermarks, or scale build-up all along the sides of the freezer, so I got my spray bottle and vinegar. Spray all sides of the inside of the freezer, then spray the inside of the freezer lid and all the rubber seals.
I’m not a huge fan of the smell of vinegar, but it was a huge improvement over what it smelled like before and it’s a natural deodorizer. I sprayed mine, let it sit for a minute, then sprayed it again before going over the whole thing one more time with my washcloth.

6. I didn’t have too much water build up in the bottom of the freezer, so I just used a bathroom towel to soak up the water, and another one to finish drying everything out really well. For good measure, I propped the door open again with my broom handle and left it for a few minutes, just to ensure it was completely dry before the next step.
7. Plug the deep freezer back in – it will need time to get cold again before you replace the food. I went and ran a couple of other errands for about 2 hours after plugging mine back in.
Now, be sure to head over to my follow-up post about how to organize a chest freezer for my tips on what to do now that it’s clean! Don’t just shove all the food back in there now that it’s out! Take the time to organize it!


nice9 says
I am reading this lovely information and help us blog thanks sharing this amazing and inoformative article